Things I Read This Week.

  It's no big secret that I love to read.  In fact I read everyday, even if it's just Celebrity Gossip (delightfully trashy) or comics on the internet (which happens when I'm too lazy/broke to go get more books).  I also read fairly fast; I can easily read a 300 page book in a day.  It's just a thing I do. However, it is the straight up/sad truth that I read a lot of fluff and crap.  Today's review does not fail in this category.  Here is what I've read this week.
 Two Gothic Romances by Dorothy Eden, and the first of another Trilogy by the Very Popular and Very Easy to Read Mercedes Lackey.
  I discovered many years ago my fondness for what is known as "New Gothic Romance" which is humorous because there's nothing new about a fiction novel from the 60s.  But I love these things.  Touches of paranormal, suspicious characters, romantic themes! and mysterious settings. Oo la la!  The sad part is I think it's basically a dieing breed of novel at this point, having been pushed aside for it's more modern counterparts of paranormal romance.  You know what I'm talking about Laurel K. Hamilton and Charlaine Harris!  I can only find these things at used book stores or the bottom back shelf of libraries. It's almost like a dirty little secret. heh heh. But enough blathering, more about the reviews/overviews.

Two Years Later!

Goodness, it's been awhile, my chickies.  If I thought about it hard enough I might feel mildly upset at not having updated my blog in such a lot time but not really.  Blogs are a lot like cookies.  Easily made, or bought depending on one's baking prowess, easily consumed, generally liked, but just as easily discarded if there is better fair.  Eventually one returns to the cookie when fancier desserts no longer have the luster they once did.  But in general, disposable.
These days I end up with a lot of free time in the evenings so I've decided to reboot my blog.  You know, use it for it the general stuff like fluffing out my ego, making witty/bitchy observations, talking shit about shit, showing pictures etc etc.  Good stuff!
The following are things that have occurred in the past two years:
  1. I quit secretary school and consequently my job as a lab and field grunt
  2. I moved to New Orleans!
  3. Got a job selling fancy dancy chocolate for two years and consequently gained about 20-30 lbs.  Mmmm Godiva.
  4. I acquired a boyfriend 
  5. Went back to school for dental assisting-in retrospect it was a giant waste of money just to pick a career direction. Have now acquired a 10k student loan to go with it. yeehaw.
  6. Lost said boyfriend and humorously enough still lived in his house for an extra six months while I finished school-much to his great consternation. Which was something of a story but not worthy of rehashing here.  Fortunately, no longer feel awkward/angry about it anymore, it's nice to be back to the warm indifference phase.
  7. Moved into my own apartment! 
  8. Got a job at a dental office as a receptionist because I have "a great background in customer service" and consequently do none of the stuff I learned in dental assisting school. Yeyyy!
  9. Decided a few weeks ago as I sat in the breezeway having lunch and watching cute gay guys in tight pants walk by, that I truly hate the mall and it's weird work hours.  So I quit and there was much rejoicing on my part. Huzzah!
  10. But now I need to find another second job, or a better primary job. :/ One or the other.  These bills need paying! Not to say that they aren't being paid now, but I'd like some wiggle room left over money-wise at the end of the month in case my car decided to hate me again.
Anyway, that's what's new!  <3


It happens more often than I care to admit.

As frequently is the case when I have a themed pony to make, I tend to generate a number of ideas before I decide on what I really want to do. The only difference from then and now is that I actually drew out several Peacock pony themed concepts instead of letting them stew in my head and eventually forget. I made four to be precise. Seeing as how they were all pretty awesome designs I decided that it would be in my best interest to attempt all four! However, sometimes when I'm in the middle of jobs that require a lot of sculpting I get easily sidetracked in my design. Thus I end up with designs that only vaguely resemble the look I was going for. But the end result is awesome enough to stand on its own so it doesn't make sense to scrap it all together.

Example #1 Paoni-in which the shapes were generally the same but entirely different in the details.

(What I intended to do.)


(What I actually made.)

Personally, I like it. But it presents its own set of issues now.

  1. This is my second attempt at this design in which things did not turn out as planned.
  2. I will need to find a new bait.
  3. Must now contemplate if I’m willing to pursue the peacock theme all the way with this new design. If not then I must generate a new color scheme entirely and I am feeling very lazy.
  4. I’ll still have to try again with the original design. Dagnabbit.

Case #2 Pavoni-in which what I was going for turned out nothing like what I generated.


I personally very much enjoy the idea of carousel ponies. I’ve loved carousels since I was but a wee cannon of creativity. When I drew this idea, I was very excited because it looked awesome and it would translate well if made properly. I eagerly set about making her as soon as the Paoni was baking in the oven. This time with a set determination that I would actually follow my ding donged design this time.

Well…talk about missing the sculpting mark. What I ended up making was this asymmetrical carousel saddle. Sigh. Don’t get me wrong, I obviously really love the shapes if I went ahead and baked it to permanence, but this isn’t helping the whole paper-to-life translation. The problem is I keep letting the sculpey speak to me too much.

On the plus side of things, at least the other two designs are coming out okay. On the downside of things, these ponies only add to my ever growing collection of Works-in-Progress. Sad is the lineup of ponies waiting to be finished... Sad and long!

Because sometimes art just needs to happen and that's all the reason you need.

The cake I posted about in my last entry was just so awesome I was quite literally high on my sense of accomplishment. The exhilaration of a job well done rushed through my veins like a water from a freshly broken dam! So I decided to harness that power and make something even more epic..something even more awesome than I've ever pondered making before.
I was going to make a cake topper for the beer cake. I discussed it amongst my roomies and we knew for sure that 1-There would be a shark and 2-there would be a bear!
At first we thought "a bear punching a shark!"
So I began work on shaping the shark's body with tinfoil whilst my lovely assistant Wesley got to work on finding me a reference picture from the internet. I finished the base with the power of tinfoil and some scotch tape here and there.

(My shark is an awesome shark. He reigns on water and earth!)


And then Wesley presented me with this gem from the internet. I was flabbergasted. I was awestruck. I knew what had to be done. There would be no punching of sharks today! Today was the day that Johnson and Craig would set out as a dynamic duo of crime fighting shark on bear action! (I have no idea what the artist named these dudes, but mine were henceforth known as Johnson the Bear and Craig the Flying Shark.)
However, if my duo was going to fight crime they were going to need some sweet accessories.

Oooh yeah. A cowboy hat, scarf, bowtie, shotgun, pair of goggles, a cigar, and bottle of whiskey later they were ready to graduate into the wonderful world of color!


And that's how Johnson and Craig came to be. They sat proudly upon their cake pedestal and were much admired by the masses! And while definitely not my proudest sculpting job considering it's 5 hour time frame from start to finish, it has to be one of my most awesome works to date. :D

You like making cake; I like eating cake

My friend Will is quite the beer enthusiast and connoisseur. He not only enjoys his beer, he brews his own whenever he can. SKILLZ!
Recently he sent me a few emails of beer related recipes. I'm not the biggest beer drinker but I'm all about trying out some funky fresh new dish. Also there is just something about an email with the subject line of "You like making cake and I like eating cake," that appeals to my humorous random spots of vanity. I was empowered! I would make this cake of awesome! If for nothing more than SCIENCE!


Fortunately, a friend of mine had a birthday party this past weekend. Great fun yey birthday! As an epic challenge to myself I decided to try this new cake recipe.

The Recipe!
IMPERIAL CHOCOLATE STOUT CAKE

Cake
  • 2 cups stout (Bell’s Expedition Stout) (I use a big Russian Imperial Stout 15.5% 1.050 FG (homebrew of course)) and I-Jenna-used the only imperial stout at the store I could find.
  • 2 cups (4 sticks) unsalted butter
  • 1 1/2 cups unsweetened cocoa powder (preferably Dutch-process)
  • 4 cups all purpose flour
  • 4 cups sugar
  • 1 tablespoon baking soda
  • 1 1/2 teaspoons salt
  • 4 large eggs
  • 1 1/3 cups sour cream
Icing
  • 2 cups whipping cream
  • 1 pound bittersweet (not unsweetened) or semisweet chocolate, chopped

  1. For cake: Preheat oven to 350°F. Butter three 8-inch round cake pans with 2-inch-high sides. Line with parchment paper. Butter paper. Bring 2 cups stout and 2 cups butter to simmer in heavy large saucepan over medium heat. Add cocoa powder and whisk until mixture is smooth. Cool slightly. (it smells like delicious beautiful fudge) Cool it a lot; you don't want the heat of the butter and oils to cook the eggs.
  2. Whisk flour, sugar, baking soda, and 1 1/2 teaspoons salt in large bowl to blend. Using electric mixer, beat eggs and sour cream in another large bowl to blend. Add stout-chocolate mixture to egg mixture and beat just to combine. Add flour mixture and beat briefly on slow speed. Using rubber spatula, fold batter until completely combined. Divide batter equally among prepared pans. Bake cakes until tester inserted into center of cakes comes out clean, about 35 minutes. Transfer cakes to rack; cool 10 minutes. Turn cakes out onto rack and cool completely.

  1. For icing: Bring cream to simmer in heavy medium saucepan. Remove from heat. Add chopped chocolate and whisk until melted and smooth. Refrigerate until icing is spreadable, stirring frequently, about 2 hours.
  2. Place 1 cake layer on plate. Spread 2/3 cup icing over. Top with second cake layer. Spread 2/3 cup icing over. Top with third cake layer. Spread remaining icing over top and sides of cake. Makes 12 servings.

Commentary
1-This cake is massive! If you're not looking to feed quite a few people I highly suggest halfing the recipe. I used 9 inch pans and the cake was at least 8-9 inches tall. HUGE! Imagine a 9 inch wide cylinder that's 8-9 inches tall and you'll have a rough approximation.

2-It is surprisingly good, in fact it is arguably the best chocolate cake I've ever made!

3-You can taste the beer but in a good way. Normally when I make a recipe that uses a special ingredient I will find myself highly disappointed that I can't taste the magic ingredient....I mean...what's the point of making it with something special if you can't even tell it's in there. Well you can tell with this. It's a rich flavor that complements the chocolate beautifully.

3-The frosting recipe is...Not good. Not good at all. I don't recommend it, but then again I am a frosting snob. Further more, I abhor making frosting. I've made many a batch of frosting in my time, but only once have I ever generated a completely awesome batch by following the recipe exactly. Every other time I've had to add things to it to make it tolerable to my standards. This...I've had worse. It's not very sweet which is good but it's also bitter because bittersweet chocolate was used. Just a bad idea. Go get yourself a better recipe. Also never forget, if you want to frost your whole cake(i.e. between layers, on top, and all the sides) always double your recipe. It's better to have too much than not enough.

What I learned from this experience.
1-A saucepan is a pot, not a high sided frying pan. Theresa and I had an intense chat of wondering about this. At what point does the frying pan turn into the saucepan and after that? When does a saucepan get to be classified as a pot? It's on that list of confusing things that are never actually explained but you're just kind of expected to know. Maybe it goes in this order? skillet-frying pan-saucepan-pot-cauldron.

2-As far as pain-in-the-butt-to-clean kitchen messes go...it's about as bad as cleaning up after a giant peanut butter massacre in your kitchen. I go to wipe up a smallish dab of chocolate and it smears EVERYWHERE! Raaah!

3-Actual Russian Imperial Stouts are difficult to locate. I settled for the closest thing I could find...and Imperial stout! I already forgot what kind it was. I know only that it had a raven on it and that it cost me $6 for the darn bottle. Being the cheapass/brokeass erhem frugal person that I am I was full of mild and brief outrage and grr. However, it was worth it. Soo very worth it. It smelled like fudge and then it smelled like the best cake ever and then it turned into cake so good my grumpy, cake-hating landlord even ate some.

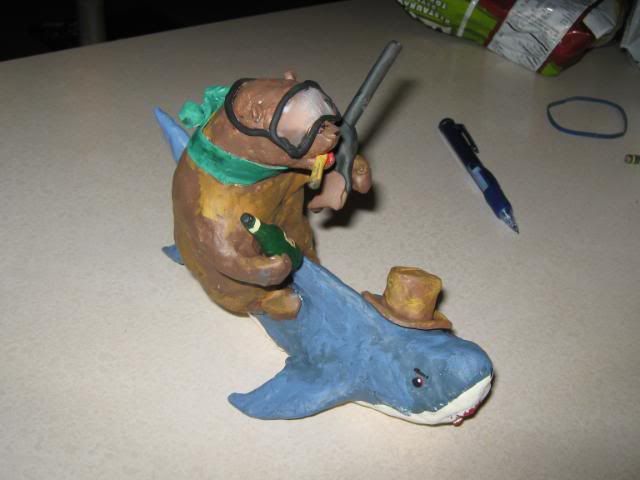
I was proud! And then I decided that the cake was so epic that it couldn't just hang out on it's own.....

There's no business like Swirl Business.

So I made a delicious swirl pony today! Or rather I started on it like a month ago and just finished last night and took pictures this morning which I'm about to show to you. So therefor I "made" this pony today. :D Instant magics!
This pony was actually made as a trade and the theme of the trade was "I like swirls let's make swirly ponies of awesome! Yey!" So we did! I already received my end of the trade. (isn't she wonderful?!) My partner specified that she likes pinks mixed with neutrals and she also like shades of gray. Plus swirls! Naturally I was very pleased because I'm more than a little overrun with pink ponies to customize.
Normally I save them up for a rainy day and have a dye-a-thon in which I dye ponies different colors that Hasbro never put out. Thus I get ponies that are black(like my soul) or red(like the raging fury that pulses through my veins!). But I digress. So yey I get to use pink...now I need a concept! and for that..I need arts.

While I was drawing the concept art it occurred to me that the interpretation of "swirls depends a lot upon the artist. When I draw swirls it tends to be all rambly, static, swirl, loop things that I call "swirls!" However, I notice a lot of people prefer a lighter look to their swirls. So it sort of brings up the question of....will this work?
Well I like it... and worst case scenario: my partner will just sell it like a lot of people do when they're thinning out their collections. Or she'll bait and no one will be the wiser. But I must take this risk! For I believe in my design!


Lookit me! I'm a swirly pony and I'm so cool!

Because I'm terribly original I named her "Smoke Swirl." Ooooooooo!
It's so swirleriffic! She'll be going to her new home either today or Monday.

Tune in next time for...Peacock themed ponies!

What time is it? Pony Time!


So I actually have a semi-secret nerd hobby of collecting and customizing my little ponies. Yeah that's right those toy ponies from the 80's as well as the ones from recent years. If you consider the fact that you have Barbie collectors and Disney collectors, the idea of people collecting my little ponies isn't so strange. But the topic of collecting and the "pony community" is one that I could discuss for hours. Rather than bore you with an indepth analysis of the hows and whys of collecting, I'm going to cut to the aspect of pony collecting that seems to have universal appeal, Customizing!
To customize=To make or alter to individual or personal specifications. So you take a pony (generally a one in poor/used condition or a common/low value pony and you turn it into pony of your own creative vision!)
  1. Well the first thing you need to do is you need to have a vision! For today's project I'm dreaming big. I decided that nothing would do but that I have a Rainicorn(as seen in the above picture) of my very own!
  2. Next I selected a pose that I think will best fit the look I'm going for. I chose for this project Crystal Lace. So cute! However in this picture the state will not do as I require a blank canvas to work with.
  3. So now that I have the idea and the pose, I have to "bait" the pony. Baiting a pony is when you prep it for customizing. I use 100% acetone(nail polish remover) to get all the paint off. Removal of hair is usually more difficult. It involves first removing the pony's head and then using a pair of pliers to pull out the hair. Generally this portion of the process involves a lot of swearing on my end. I tend to stash up a bunch of ponies and then bait them all in one go. Kind of consumes an afternoon but if you have nothing better to do it's not so bad to just sit in front of a tv and go to town on it. Unfortunately I didn't think to take pics of the freshly baited pony. So I'm substituting with a picture of some baits that I dyed semi-recently. That's what a prepped bait should look like.
  4. So now I'm sure you're wondering to yourself, 'How's she going to take a squatty pony like that and turn it into that picture of the rainicorn?' Well I could just paint the bait as is into the pony in the picture, but I decided that I'm too much of a badass to let it sit at that. So I cut out the stomach with an exacto knife and gave the pony a new stomach with tinfoil. Yey tinfoil!
  5. So now that the basic structure is ready I cover the stomach in super sculpey and try to smooth out the lines as best as possible. Then it's into the oven she goes on cookie sheet. :)
    It's serious art business! I promise I know what I'm doing. Anyway the clay that I use is the baking variety. Baking is definitely a must, especially considering that we still have to add horn, mane, and a tail. So pony comes out! And that is the end of sculpting round one.
  6. In the beginning I mentioned that when a pony is baited, all the hair is often taken out. Well when it comes to replacing the hair you have two options. 1-Put more synthetic hair back in, except this time in colors of your choosing. Or 2-sculpt that hair! As I'm not in the mood to rehair a pony this time, I decided to go she sculpting route. So sculpt sculpt sculpt. And bake! (p.s. pay no mind to my mini bottle of rum in the background....many things fuel my cannon of creativity!)
  7. Now that the mane, tail, and horn have been baked to perfection and the body sanded down to near smoothness it's time to apply the base coat. The kind of colors needed for this won't sit well on just plain, ol' flesh toned clay. So it shall be whited out!

And actually...this is where I leave you because this is as far as I've gotten since starting Thursday night. Thanks for looking and tune in next time for Rainicorn: the paint job!